Artificial Intelligence with Photo Supreme
Introduction
Photo Supreme is a tool that helps you organize and manage your image files by sorting them into categories. To make the cataloging process easier, it includes artificial intelligence (AI) features that can analyze your photos and suggest labels, identify objects, landmarks, or even faces.
Photo Supreme offers four types of AI capabilities:
- Built-in AI features: These are ready to use as soon as you install the software and include tools like face detection and recognition.
- OpenAI Platform features: Powered by the same technology as ChatGPT, OpenAI adds tools like metadata descriptions and suggestions for catalog labels.
- Google Gemini Platform features: As an alternative to OpenAI, powered by Google’s Gemini models, the platform adds tools for metadata descriptions and catalog label suggestions.
- Ollama Platform features: Like OpenAI, Ollama provides tools like metadata descriptions and catalog label suggestions, with a focus on private AI solutions.
- Google Vision Platform features: Expands the functionality with advanced tools like label detection, object recognition, landmark identification, and text extraction.
To use the OpenAI, Google Gemini or Google Vision features, you’ll need to set up your own API key on their platform. Detailed instructions for setting this up are available in the setup manuals, which you can find in? icon of the left sidebar of the application. For more information on choosing between OpenAI, Google Gemini and Ollama, refer to the guide included in this manual.
Face Detection and Face Recognition
Face Detection and Face Recognition are built-in features of Photo Supreme. They’re ready to use immediately after installation: no need for an OpenAI or Google API key. Face Detection and Face Recognition are local features that process images directly on the device.
- Face Detection spots areas in an image that look like faces.
- Face Recognition identifies who those faces belong to by matching them to known individuals.
In Photo Supreme, face detection and recognition work together automatically. When you turn on this feature, the program first looks for any faces in your photo. Then, it tries to match those faces with people already saved in your catalog.
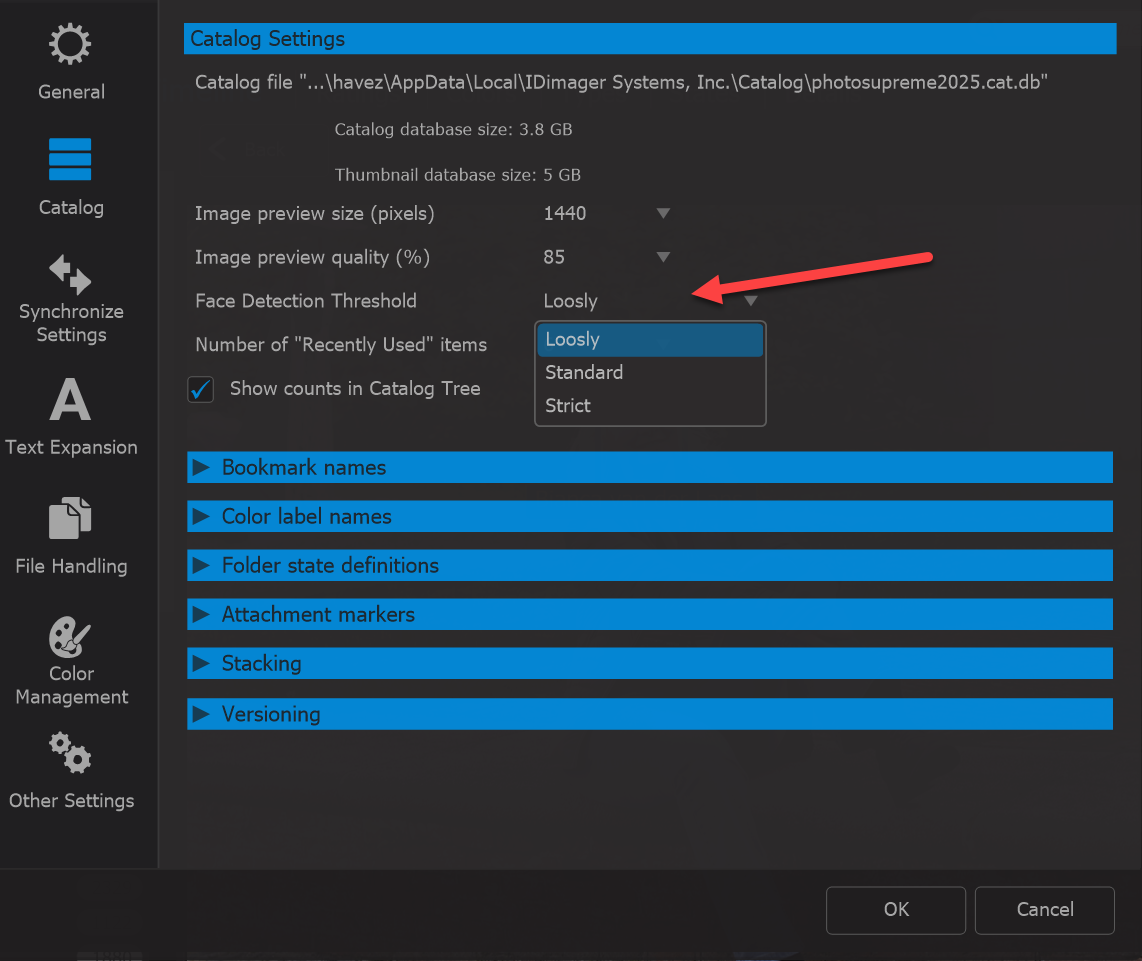
You can adjust how sensitive this face detection is in the Preferences under the Catalog section. There are three options: Loosely, Standard, and Strict.
- Loosely finds more faces, but it might sometimes think it sees a face when it doesn’t.
- Standard is a balance between the two.
- Strict is more careful and makes fewer mistakes, but it might miss some faces.
By default, it’s set to Loosely to catch as many faces as possible.
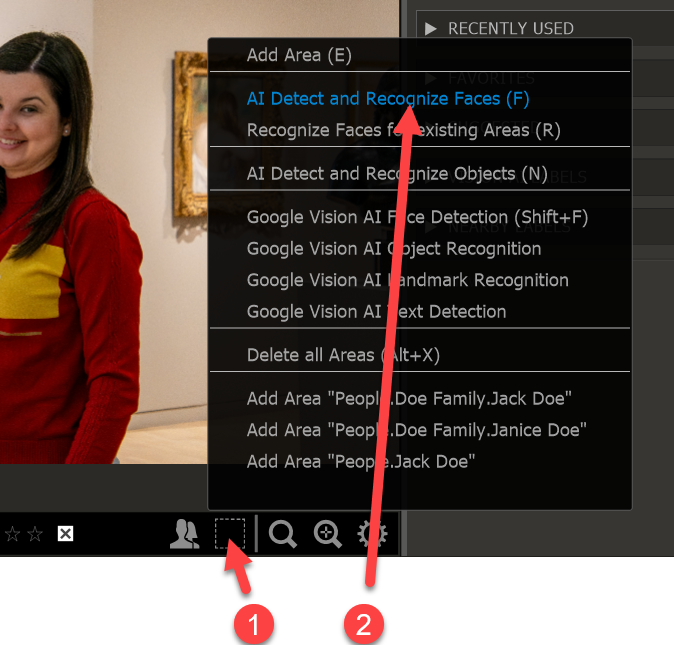
To use Face Recognition, open an image in the Image Viewer, then choose "AI Detect and Recognize Faces" from the menu or simply press the F key on your keyboard.
If you’re using this feature for the first time, the detected faces won’t be identified yet because the AI engine hasn’t learned to recognize individuals.
Tip: If you don’t see the Areas button below the image, make sure the area display is turned on. You can enable it by going to Options > Show Areas.
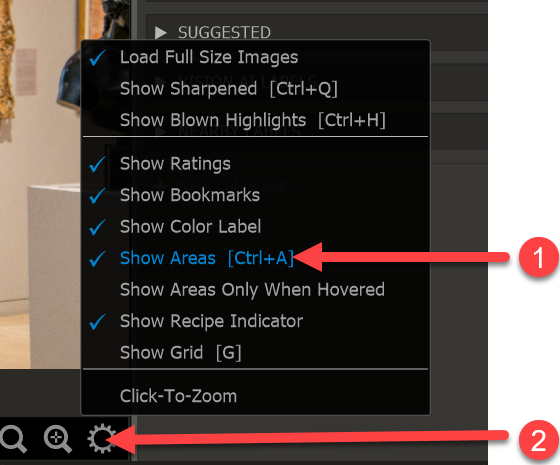
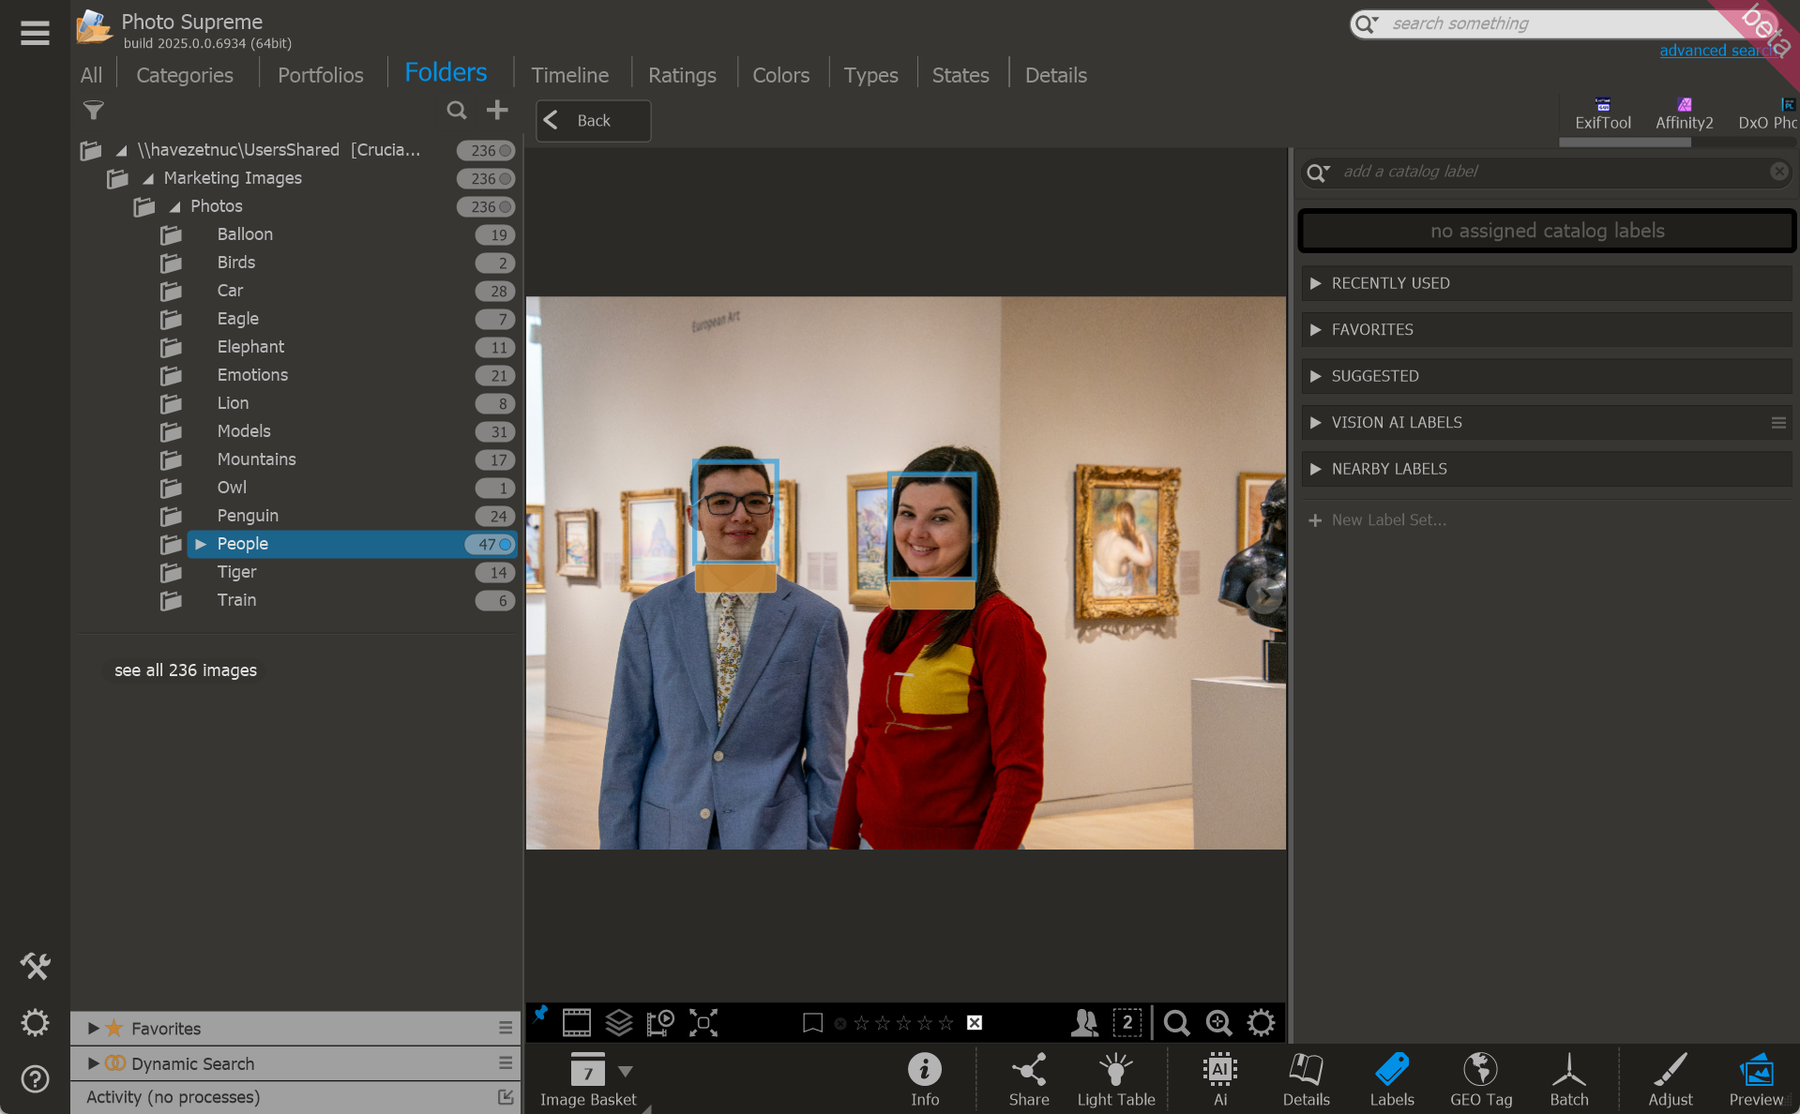
At first, no names will appear under the detected faces. Face areas are highlighted if they are automatically detected.
Tip: If the software misses a face, you can add it manually. To do this, hold the Alt key (or Opt key on macOS) and drag a box around the face on the image.
To tell the software who a face belongs to, assign a name (called a Catalog Label) to the highlighted area. Once you do this, the software will start recognizing that person automatically in future images.
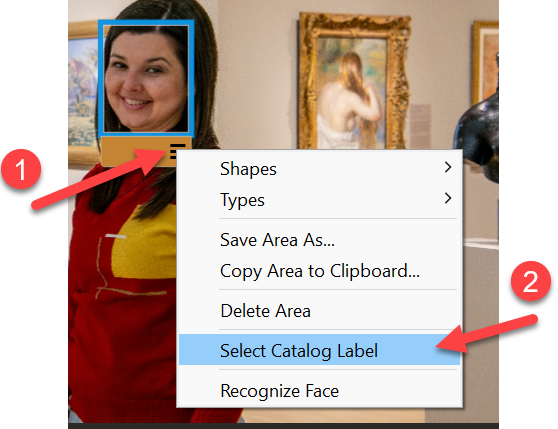
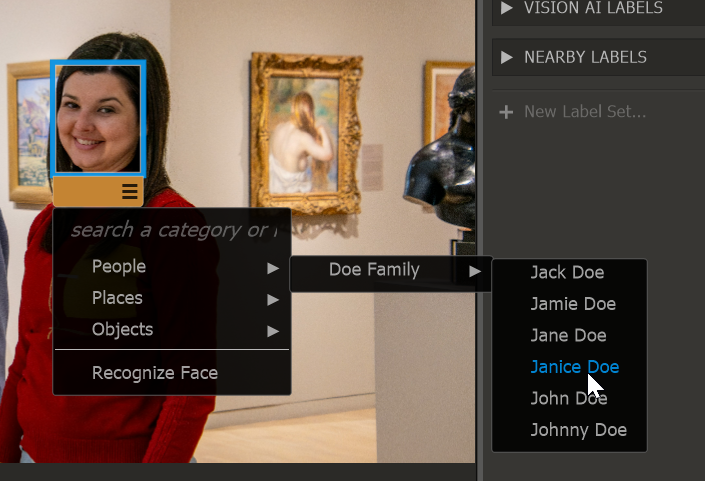
You can then either manually enter the person’s name or select it from the drop-down menu.
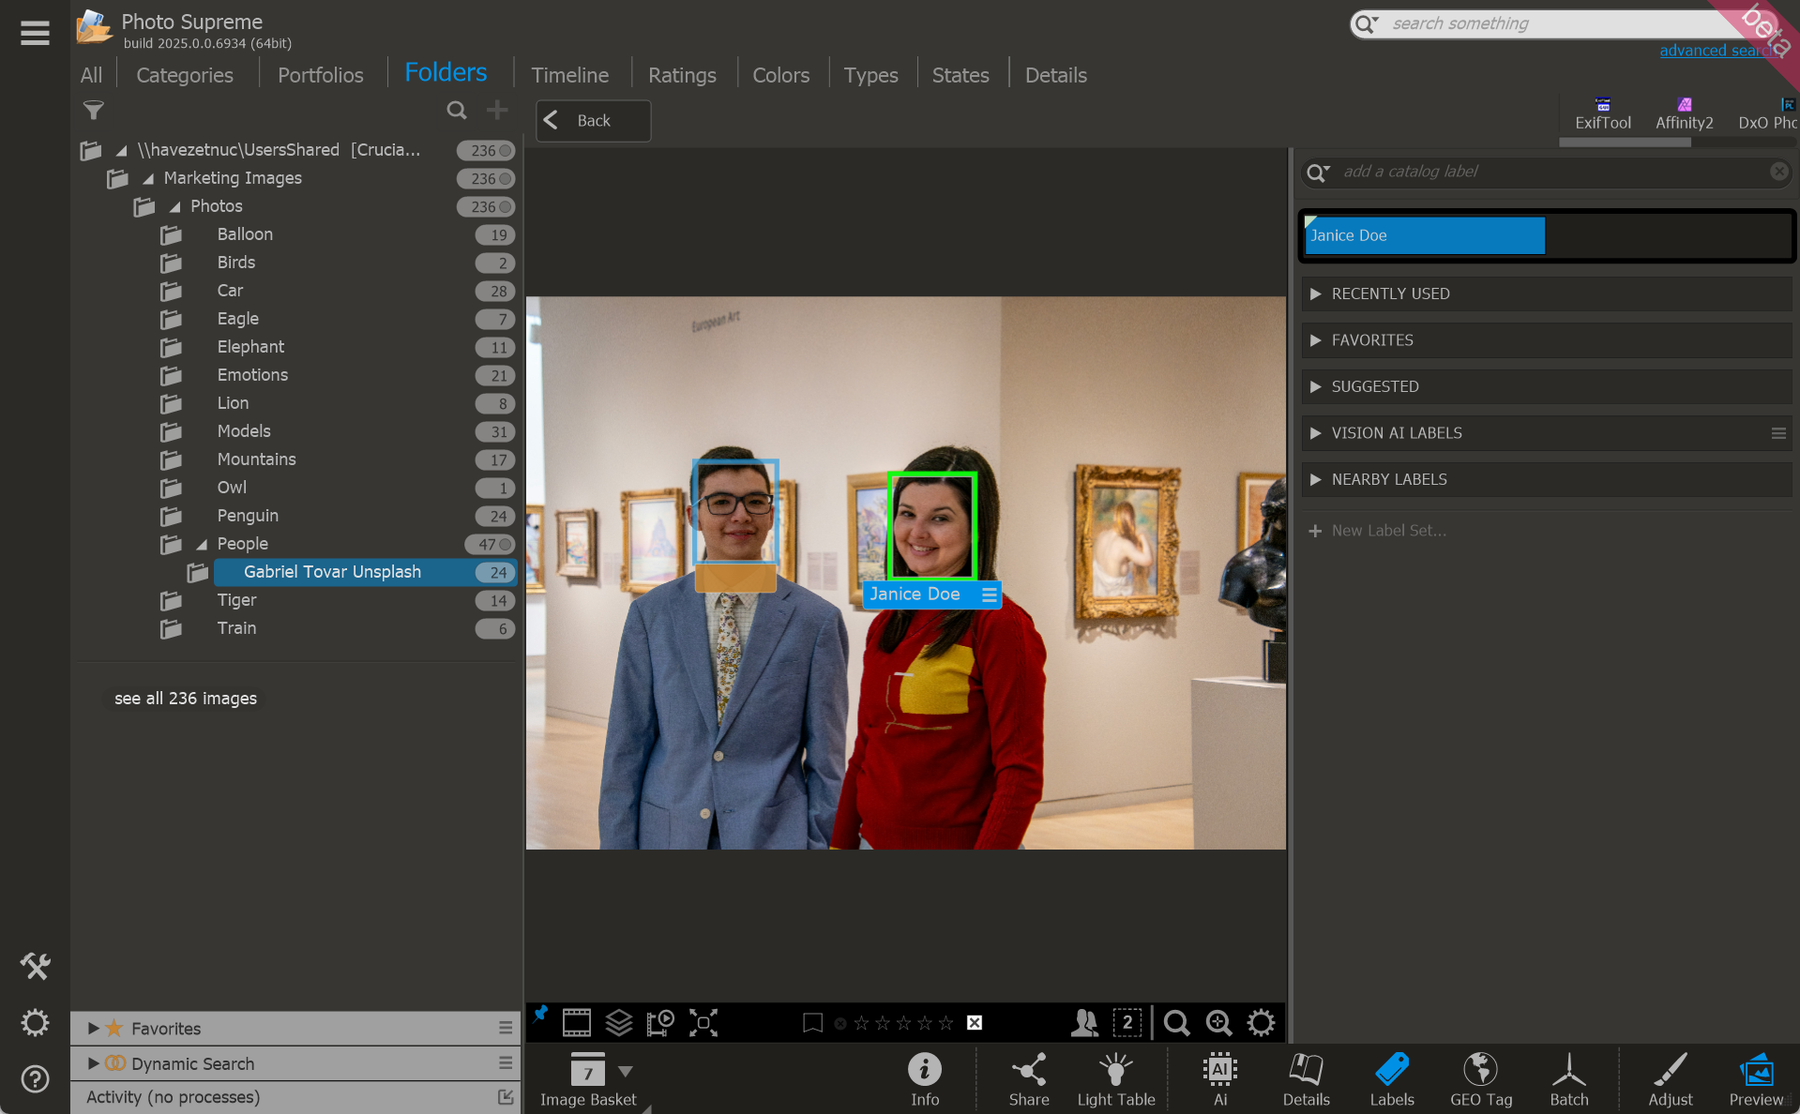
The face is now confirmed as belonging to this person, and the Catalog Label has been assigned to the image.
If you don't have a Catalog Label for the person yet, you can double-click the area's caption and manually enter a name, with the option to create the label afterward.
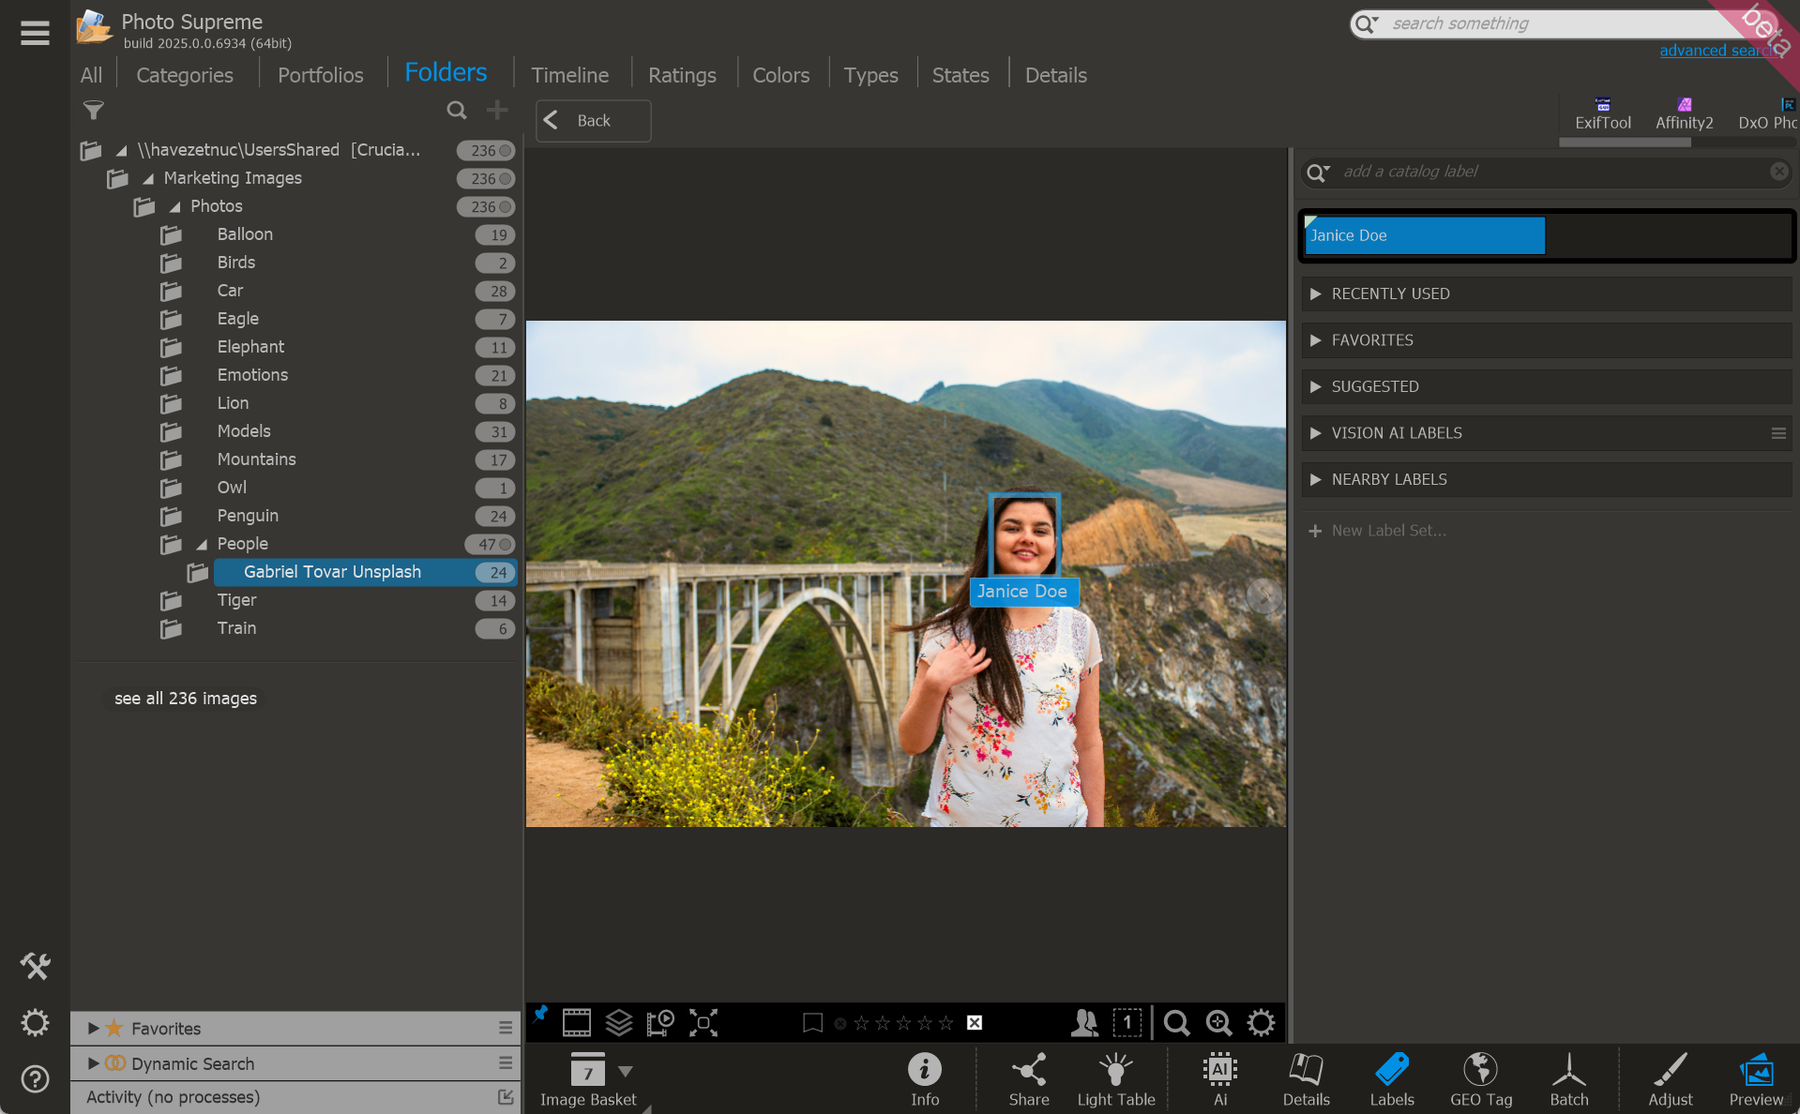
When you link a name (called a Catalog Label) to a face, that face becomes "confirmed" and will be shown with a green frame. A confirmed face acts as a reference to help the software recognize that person in future images.
Once a face is confirmed, Photo Supreme will automatically identify it in other images without you needing to confirm it again, as long as the software detects the same person. You don’t need to confirm every face in every image. If a face has already been recognized from a previous confirmation, it’s automatically matched in new photos.
To detect faces and recognize the person, simply press the F key on your keyboard. This will trigger the software to find faces in the image and try to match them to known (confirmed) individuals from your catalog.