
Install Photo Supreme Server with SQL Server 2022
Configuring SQL Server
After a new installation of SQL Server, you need to make a few configuration changes before accessing the database. Changes are made in the SQL Server Configuration Manager. In Windows 11, you can find it under Start Menu → All Apps → Microsoft SQL Server 2022. In Windows 8, you can find it on the Metro Start page; in earlier Windows versions, select it from the Start menu.
- We need to configure SQL Server to allow connections over TCP/IP.
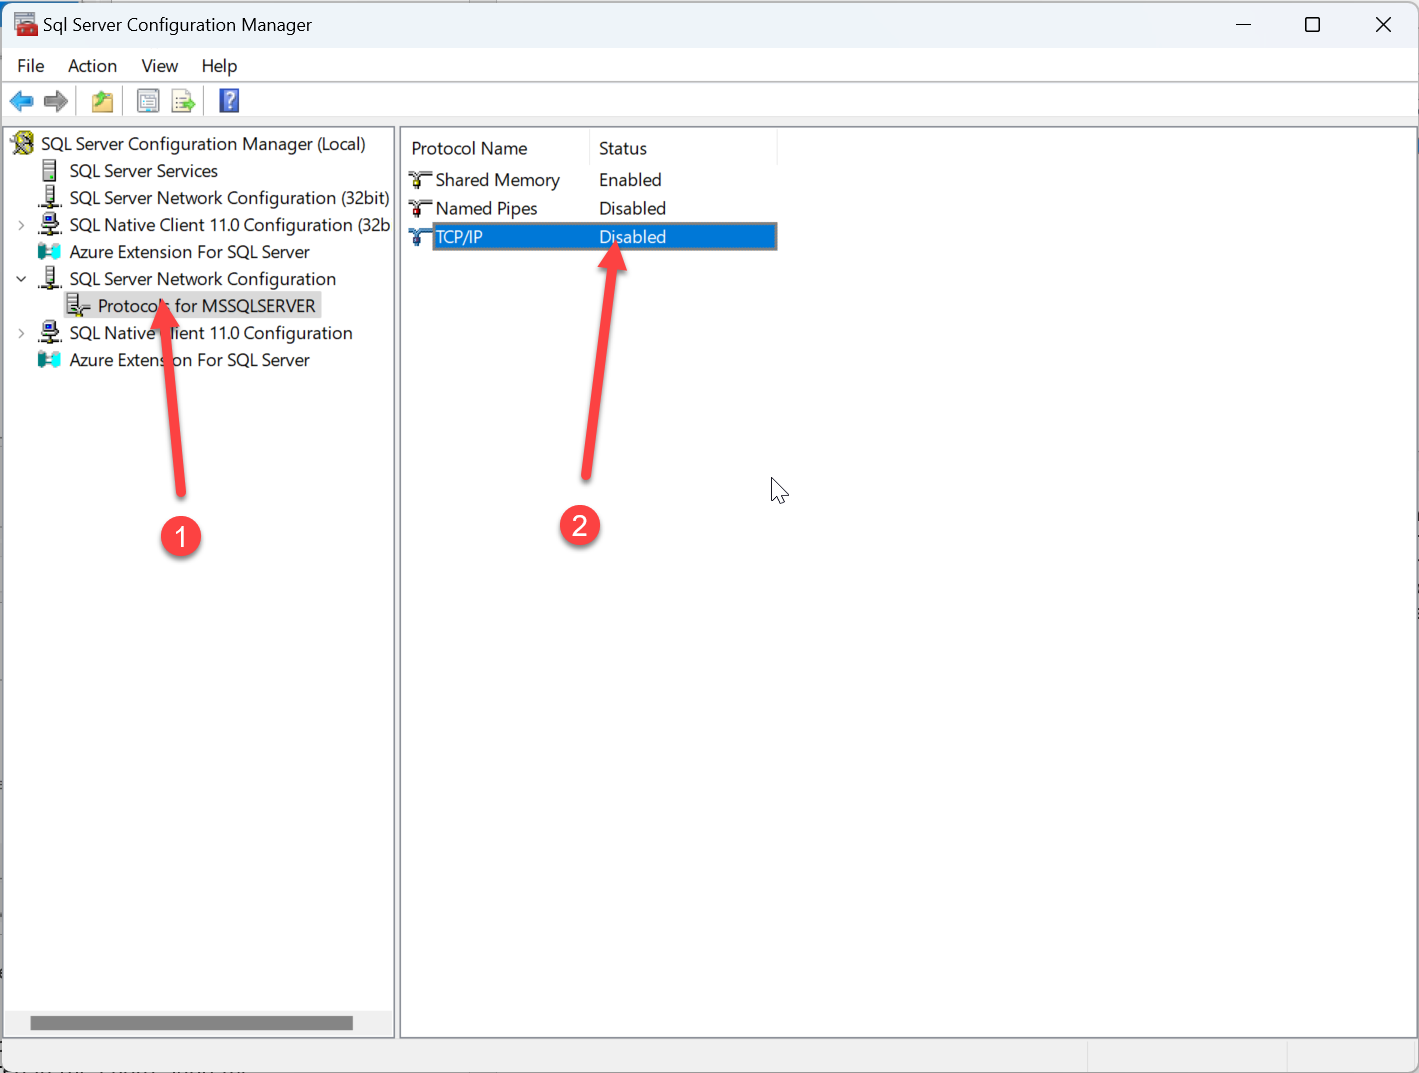
By default, this is disabled. To enable it, open the SQL Server Network Configuration and double-click the TCP/IP protocol.
- On the properties page, change the “Enabled” state to “Yes”.
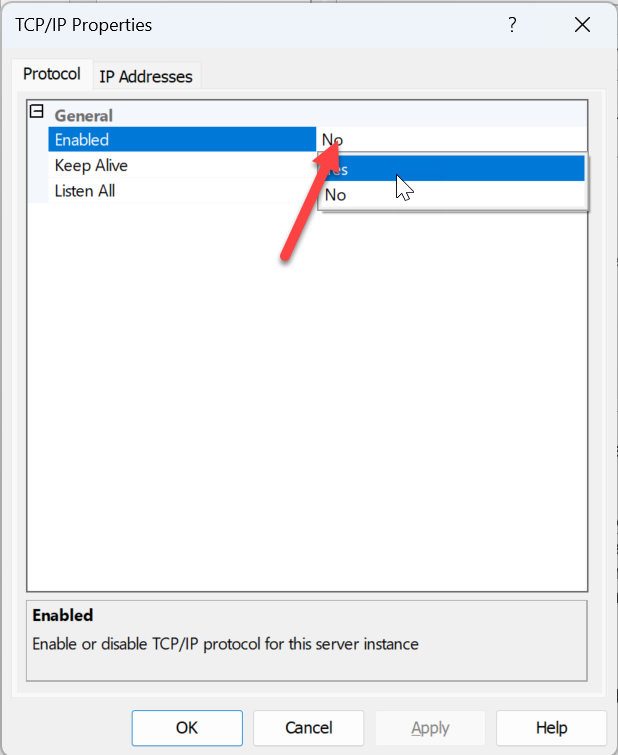
- Click “OK” to confirm the changes.
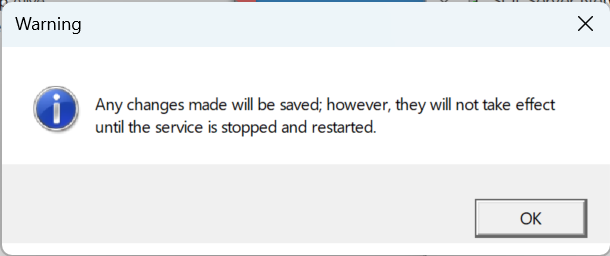
Take note that you should now restart the SQL Server Service for the TCP/IP changes to take effect.
We will do that later, but first you need to think about backups. If you are planning to use the backup feature that is integrated in the Photo Supreme application, then you should make sure that the user account associated with the SQL Server service (the account that actually *runs* the SQL Server service) has access to the intended backup folder. First decide where you want to make backups.
- Configure the login-account (optional but highly recommended).
By default, the SQL Server service is started by the Windows NTService/SQL Server launcher account.
Open the “SQL Server Services” and then double-click the “SQL Server” service.
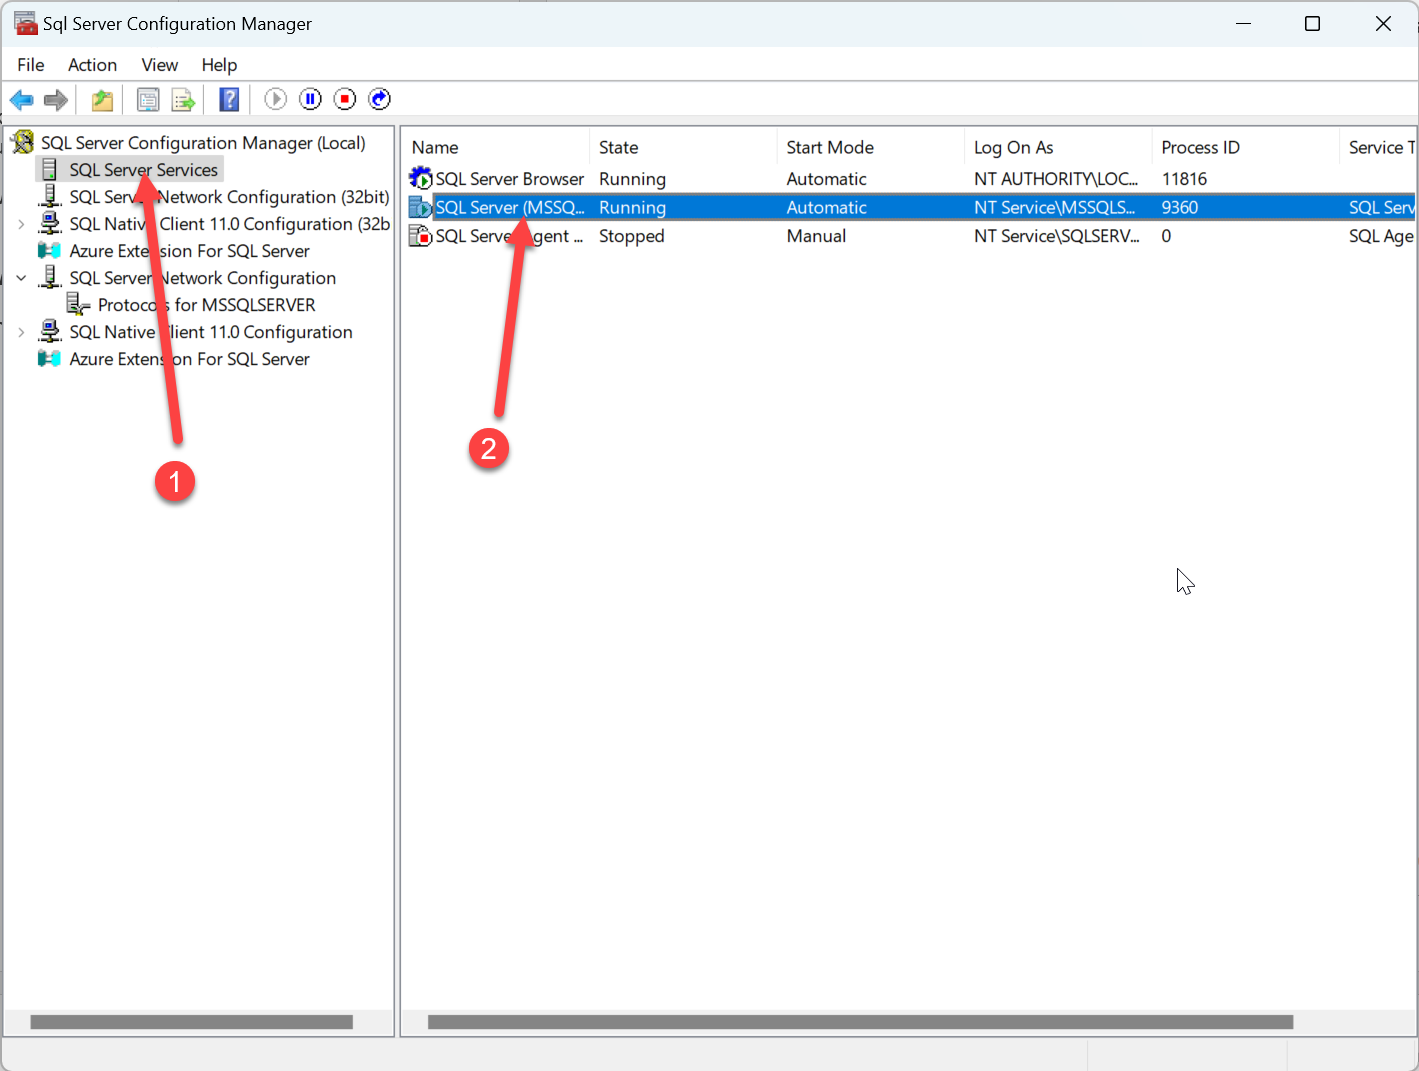
On the “Log On” tab, you can set the service account. In this example, SQL Server runs on the local computer and backs up to a folder on its local disk. Running the SQL Server service under an administrator account ensures that SQL Server can access any local folder selected as a backup folder in Photo Supreme. You can also opt to create a new user account for SQL Server and make sure that it has all the required privileges.
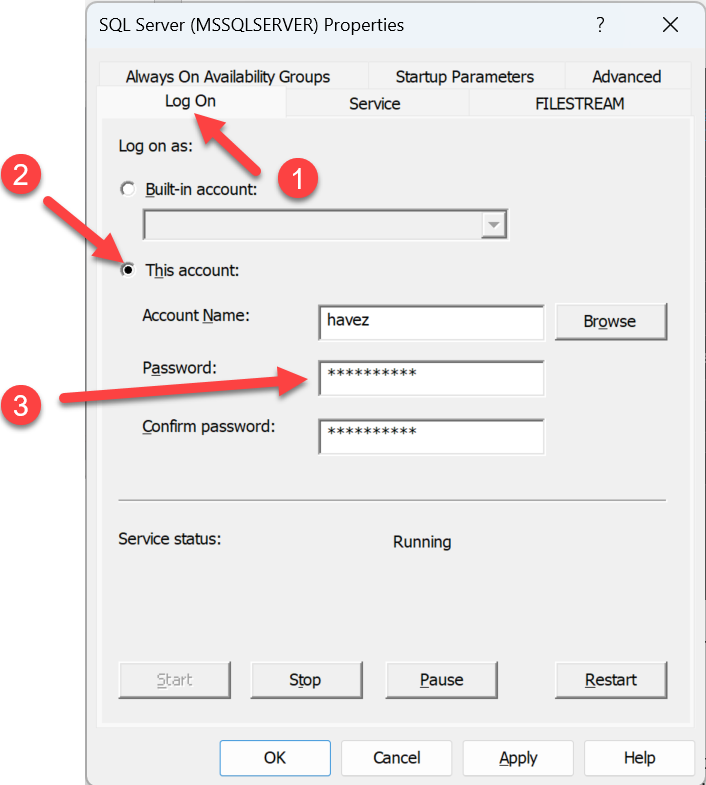
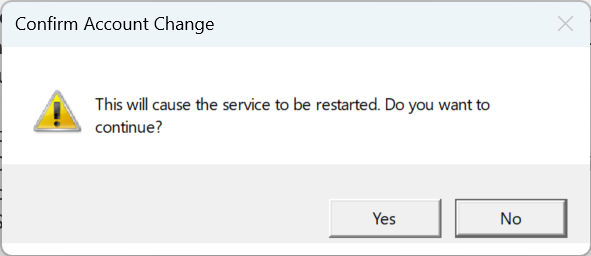
Then click Apply and optionally agree to restart the service.
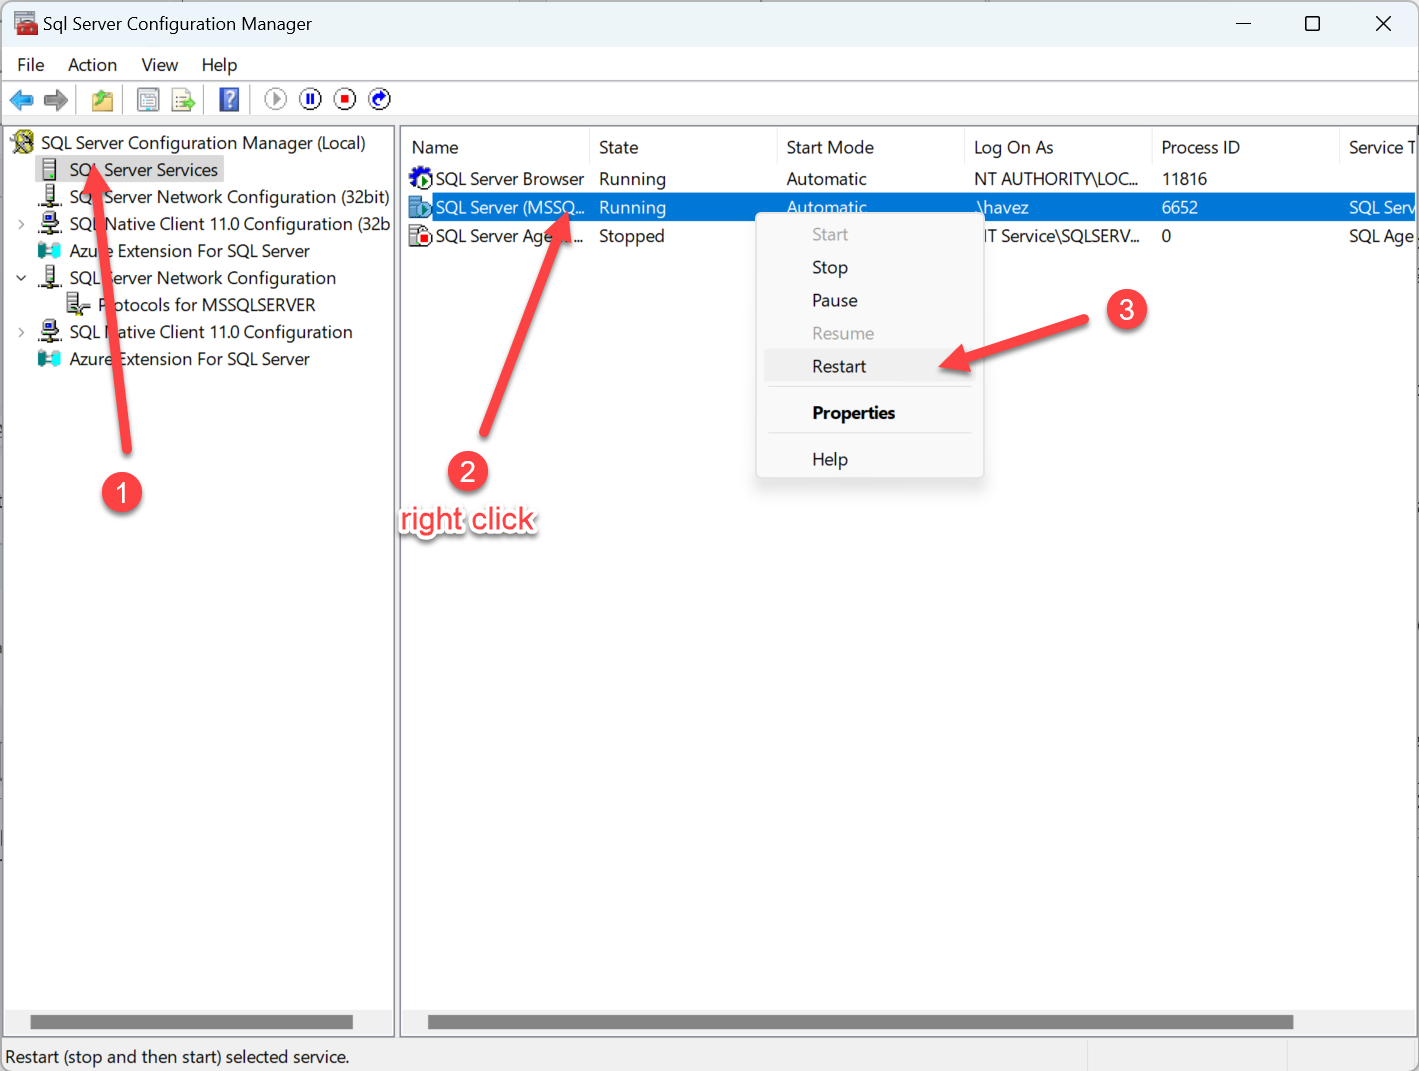
- To restart the SQL Server service manually, open “SQL Server Services,” right-click the “SQL Server” service, and select “Restart.”
This completes the configuration process. You should now be able to connect to SQL Server from Photo Supreme.