
User Management in Photo Supreme Server
Creating a new user
You can create a new user by clicking the plus (+) button located in the lower left corner.
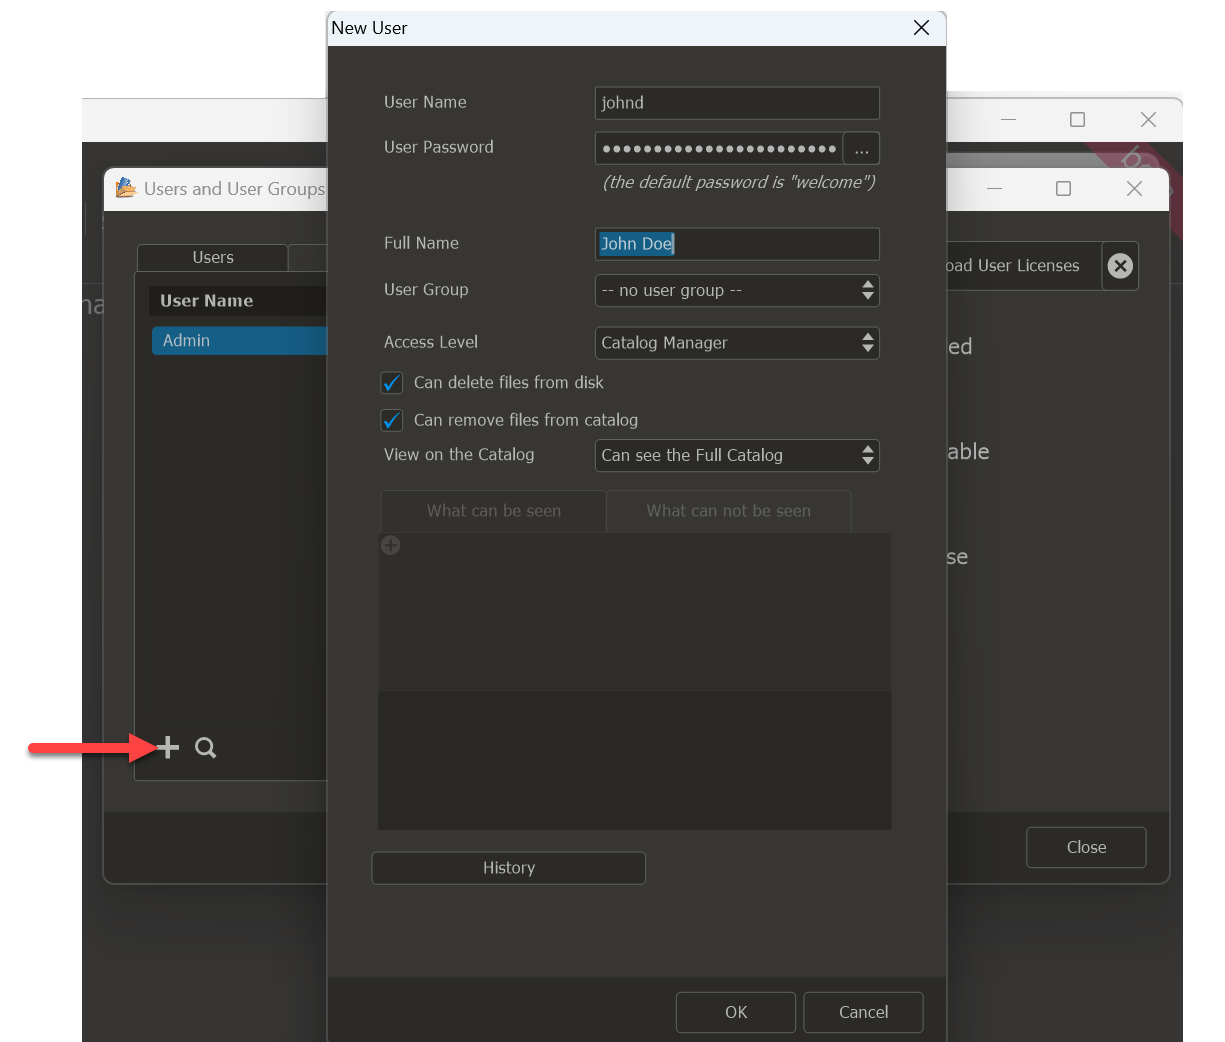
Complete the fields for the new user.
User Name
Enter the login name for the new user. Choose carefully, as this name cannot be changed later.
User Password
By default, new users are assigned the password “welcome”. To set a custom password, click the […] button in the password field.
Full Name
Enter the user’s full name.
User Group
If the user should inherit permissions from an existing group, select the appropriate User Group from the list.
Access Level
Assign the user’s role by selecting the appropriate access level.
Can delete files from disk
Check this box to allow the user to delete files directly from the disk using Photo Supreme.
Can remove files from catalog
Check this box to allow the user to remove files that have already been added to the catalog.
View on the Catalog
You can restrict each user’s access to specific parts of the catalog, controlling exactly what they can view. This limitation can also be applied to Catalog Managers, enabling organizations to assign different managers to separate sets of images.
The access control options available are:
Can see the Full Catalog; The user has access to all items in the catalog.
Restrict Catalog View; The user’s view is limited to only certain parts of the catalog.
What can be seen
If you’ve set up a restricted catalog view, use this section to specify the data the user can access.
Click the Plus button and check the boxes for the items you want the user to see. Keep in mind that selecting a parent item will also grant access to all its sub-items.
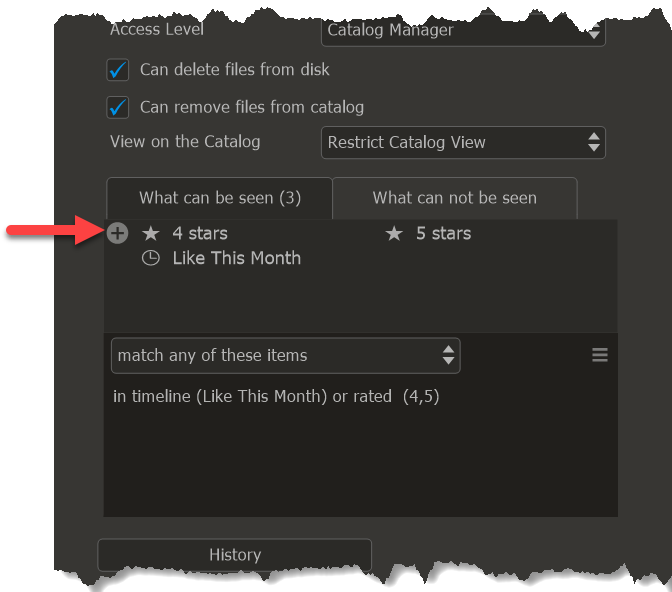
In this example, the user is allowed to view all images that are rated 4 or 5 stars and were taken this month.
Tip: Use the Advanced Search feature to set up user access restrictions more efficiently.
What cannot be seen
Just as you can define what a user can see, you can also exclude specific items from the catalog. Any excluded items will remain hidden from the user, even if they meet the criteria set in the “What can be seen” section.
Click "OK" to save the new user. You will then return to the User Management dialog. John Doe can now access the application using the password you set.