
Folder and File Management with Photo Supreme
File Management
Although Photo Supreme manages images stored in its database, you can still perform file operations directly on the file system in a seamless manner, similar to using a file browser. With Photo Supreme, you can:
- Look up files on disk.
- Copy files.
- Rename files.
- Move files.
- Delete files.
File operations generally occur in the Folders section. To access this section, click on "Folders" in the Catalog Bar.
The Catalog Explorer now shows the contents of the catalog, arranged in a folder hierarchy.
Lookup a file
Within Photo Supreme, you can select a file in the operating system’s file browser, which is Windows Explorer or macOS Finder. To open a file in the file browser, right-click on a thumbnail and choose “Locate in Windows Explorer” or “Locate in Finder”. This action will open the file browser, navigate to the relevant folder, and highlight the selected file or files.
Copy files
Right-click on one or more selected thumbnails and choose “Copy”. Then, in the FOLDERS view, navigate to the folder where you want to paste the files. Right-click in the background (not on a thumbnail) and select “Paste to this Folder”.
Rename files
To rename a single file, select the file and then:
Press F2 on Windows.
Double-click the filename of the thumbnail on a Mac.
This allows you to edit the filename. Simply enter a new name (be sure to include or keep the file extension) and press Enter to confirm. If you have saved rename rules, you can choose one from the dropdown menu.
You can also rename multiple files at once:
Select the thumbnails you want to rename.
Right-click on one of the selected thumbnails.
Choose Operations → Rename Files.
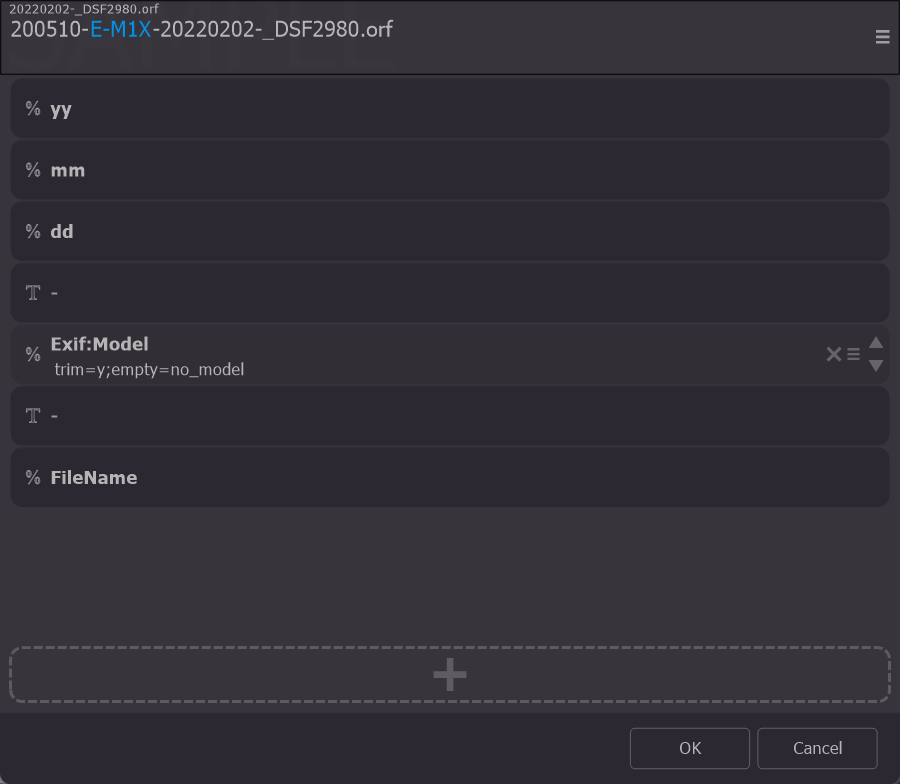
This will open the rename dialog where you can create a new filename. While it’s beyond the scope of this manual to explain macro commands in detail, it’s important to know that each macro command will be replaced by its corresponding value during the renaming process.
Macro commands function like generic variables; for example, the macro command %FileName represents the file's name, and %FileExtension represents the file’s extension. You don’t need to memorize all these macros, as you can select them from a dropdown by clicking the plus (+) icon at the bottom.
Tip: Read more about Macro Commands in the Macro Manual
Move and Rename
The "Move and Rename" feature helps you organize files by automatically placing them in the correct folder and giving them the right name in one step.
How It Works:
Moving Files – If you have a structured folder system (like one organized by date), this feature moves files from an old folder to the correct new folder.
Renaming Files – At the same time, it renames the files based on a defined rule or format, ensuring they are correctly labeled in their new location.
This is useful when managing large numbers of files, keeping things organized, and ensuring filenames match your system's naming conventions.
You can Move and Rename multiple files at once:
Select the thumbnails you want to rename.
Right-click on one of the selected thumbnails.
Choose Operations → Move and Rename Files.
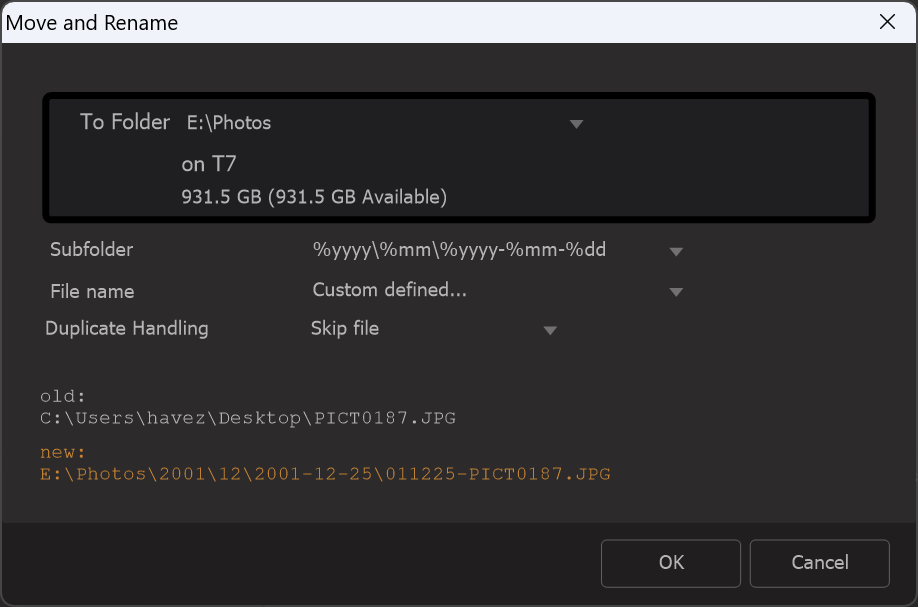
This will open the Move and Rename dialog where you can define the target folder and construct a new filename. While it’s beyond the scope of this manual to explain macro commands in detail, it’s important to know that each macro command will be replaced by its corresponding value during the renaming process.
Macro commands function like generic variables; for example, the macro command %FileName represents the file's name, and %FileExtension represents the file’s extension. You don’t need to memorize all these macros, as you can select them from a dropdown by clicking the plus (+) icon at the bottom.
Tip: Read more about Macro Commands in the Macro Manual
Move a file
You can move a file using either the cut-and-paste method or by dragging the file to another folder in the FOLDERS view.
To use cut and paste, right-click on one or more selected thumbnails and choose “Cut”. Then, navigate to the desired folder in the FOLDERS view. Right-click in the background (not on a thumbnail) and select “Paste to this Folder”.
Removing or Deleting files
Photo Supreme offers two options for handling files: Remove and Delete. Removing a file means it is taken out of the catalog, while deleting a file means it is permanently removed from the file system.
To remove or delete a file from the catalog, select one or more thumbnails, then right-click on a thumbnail and choose “Delete”.
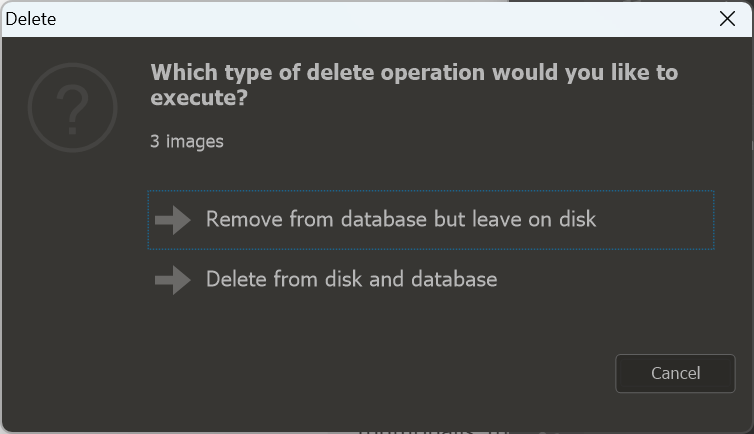
This will present you with all the relevant delete options. Choose the delete operation that you require.
Deduplication
There are several different approaches to handling duplicate files.
- Identical Files: Exact copies of the same file.
- Visually Identical Files: Different files that look the same, such as an original image and a downsized version, or multiple edited copies of the same photo.
- Identical File Names: Files that share the same name but may or may not be duplicates of the same image.
To declutter a folder, we’ll begin by identifying exact duplicate files.
Identical Files
A file is considered identical when its content is an exact duplicate of another file. In other words, the files have the same data inside, even if their file names are different.
Photo Supreme includes a Deduplicator Tool that can be used to identify duplicates. To open it, click the Tools button on the left sidebar, then select Deduplicator from the menu.
The Deduplicator has a 3-step interface:
1. Configure your settings.
2. Find duplicates and choose the desired action.
3. Review and confirm your selections.
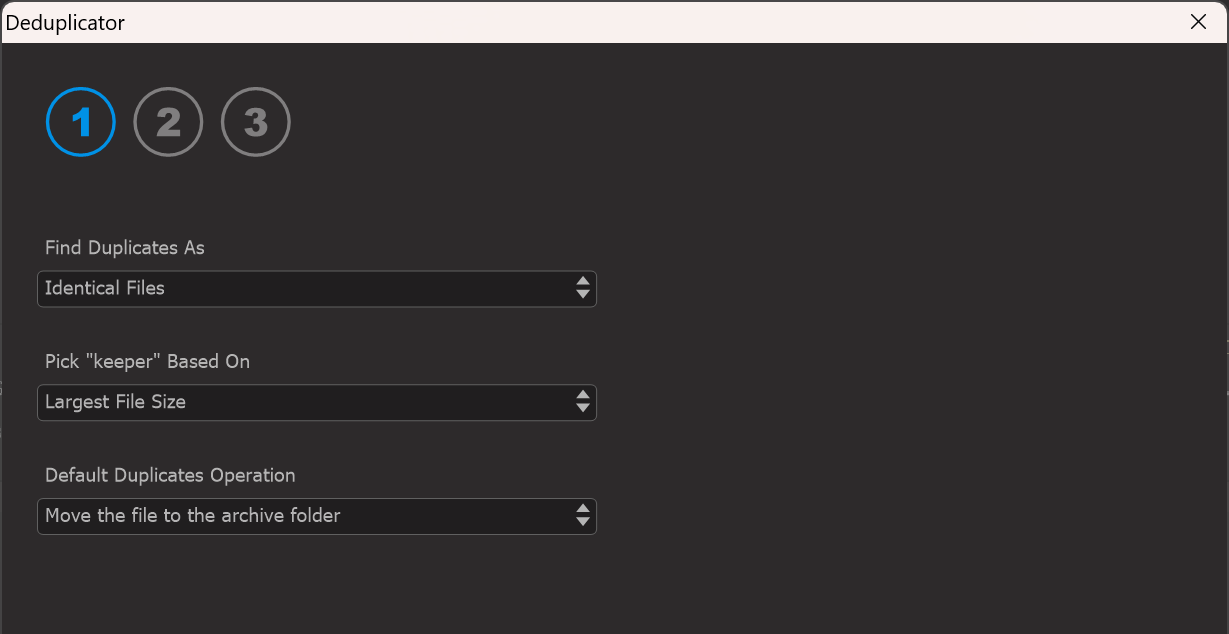
- Configuration.
In this step, you choose the type of duplicate detection to perform: - For “Find Duplicates As”, select “Identical Files”.
- The “Pick “keeper” Based On” setting is less relevant here since all files are identical. However, you can set it to “Newest File Stamp” to keep the most recently created file.
- For “Default Duplicates Operation”, choose whether to move duplicates to an archive folder (which you can review and delete later) or delete them from disk. Since we’re dealing with identical files, selecting delete from disk is appropriate.
In summary, this configuration will find files with identical content, keep the newest version, and delete all other duplicates from your disk.
Click Next to begin the duplicate detection process.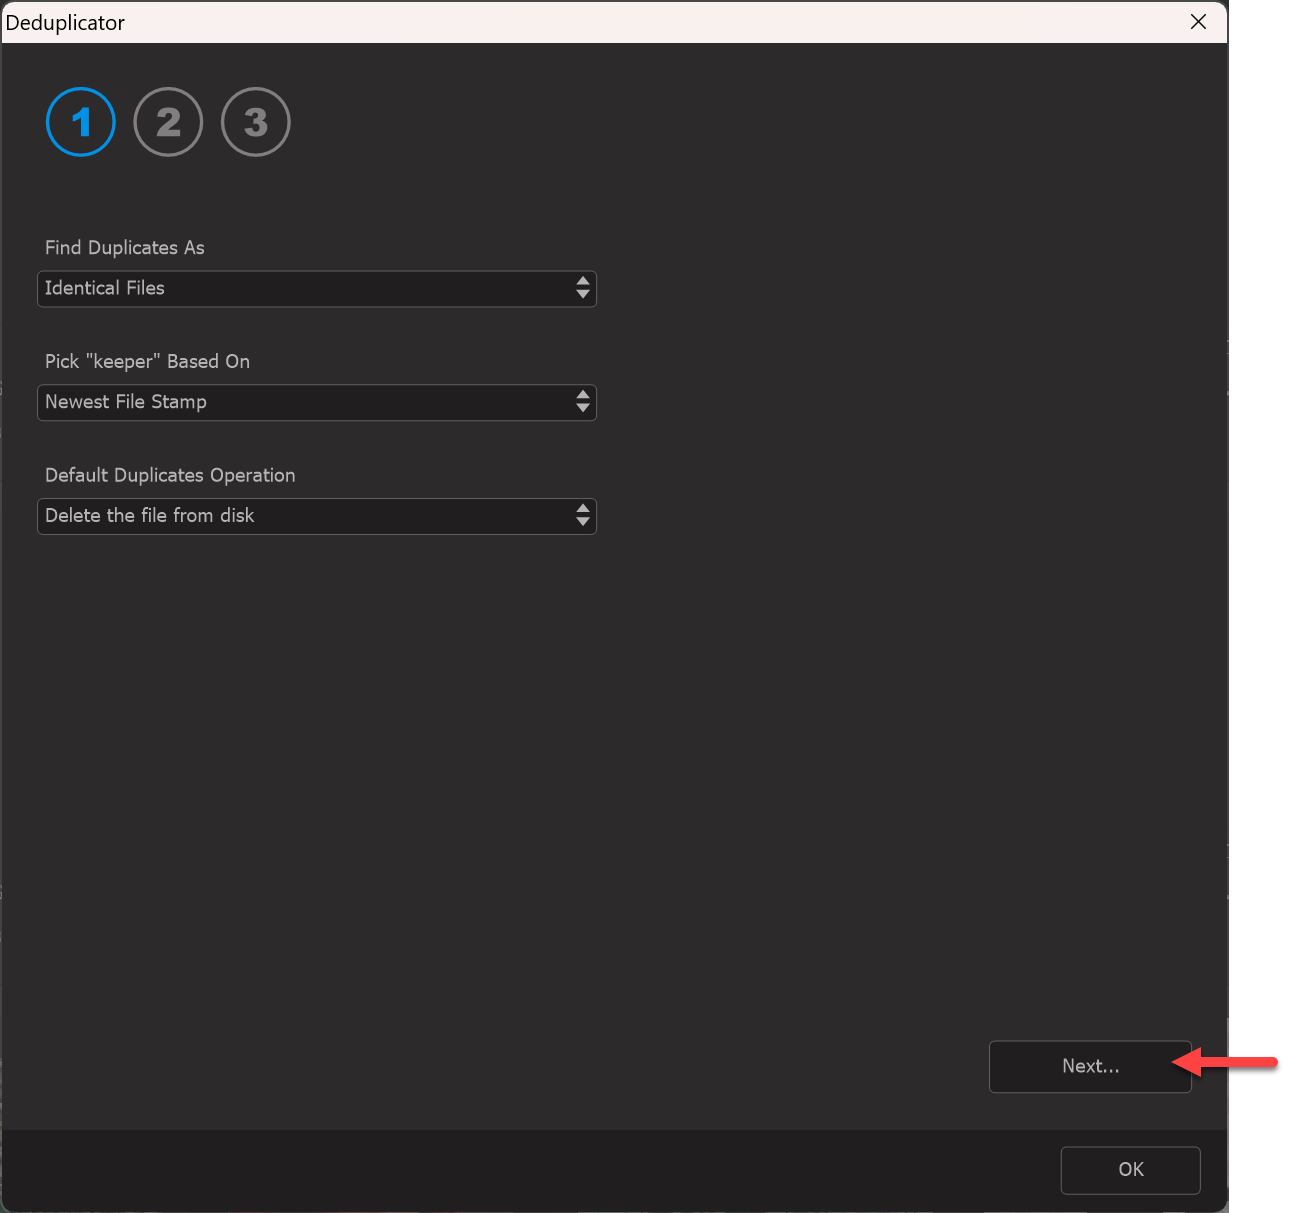
- When identical files are found, a list of detected duplicates will be displayed. In each group, the “keeper” appears first, followed by the duplicate files to its right.
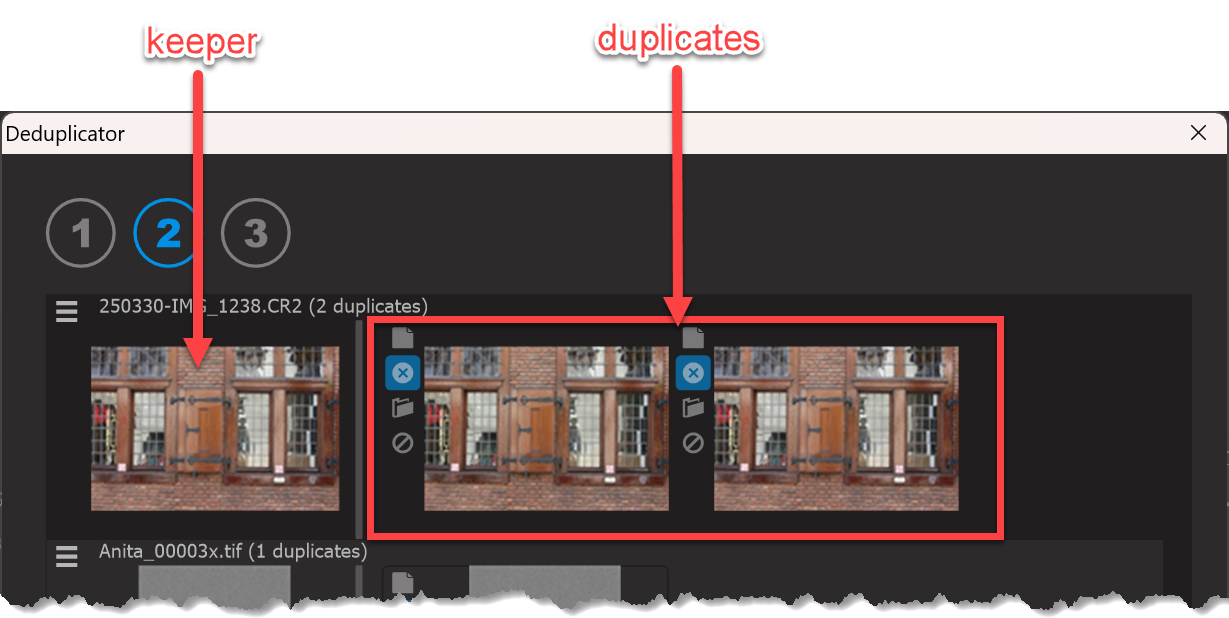
- Review the detected duplicates and the proposed actions. If you’re satisfied with the results, click Next to proceed to the confirmation step.
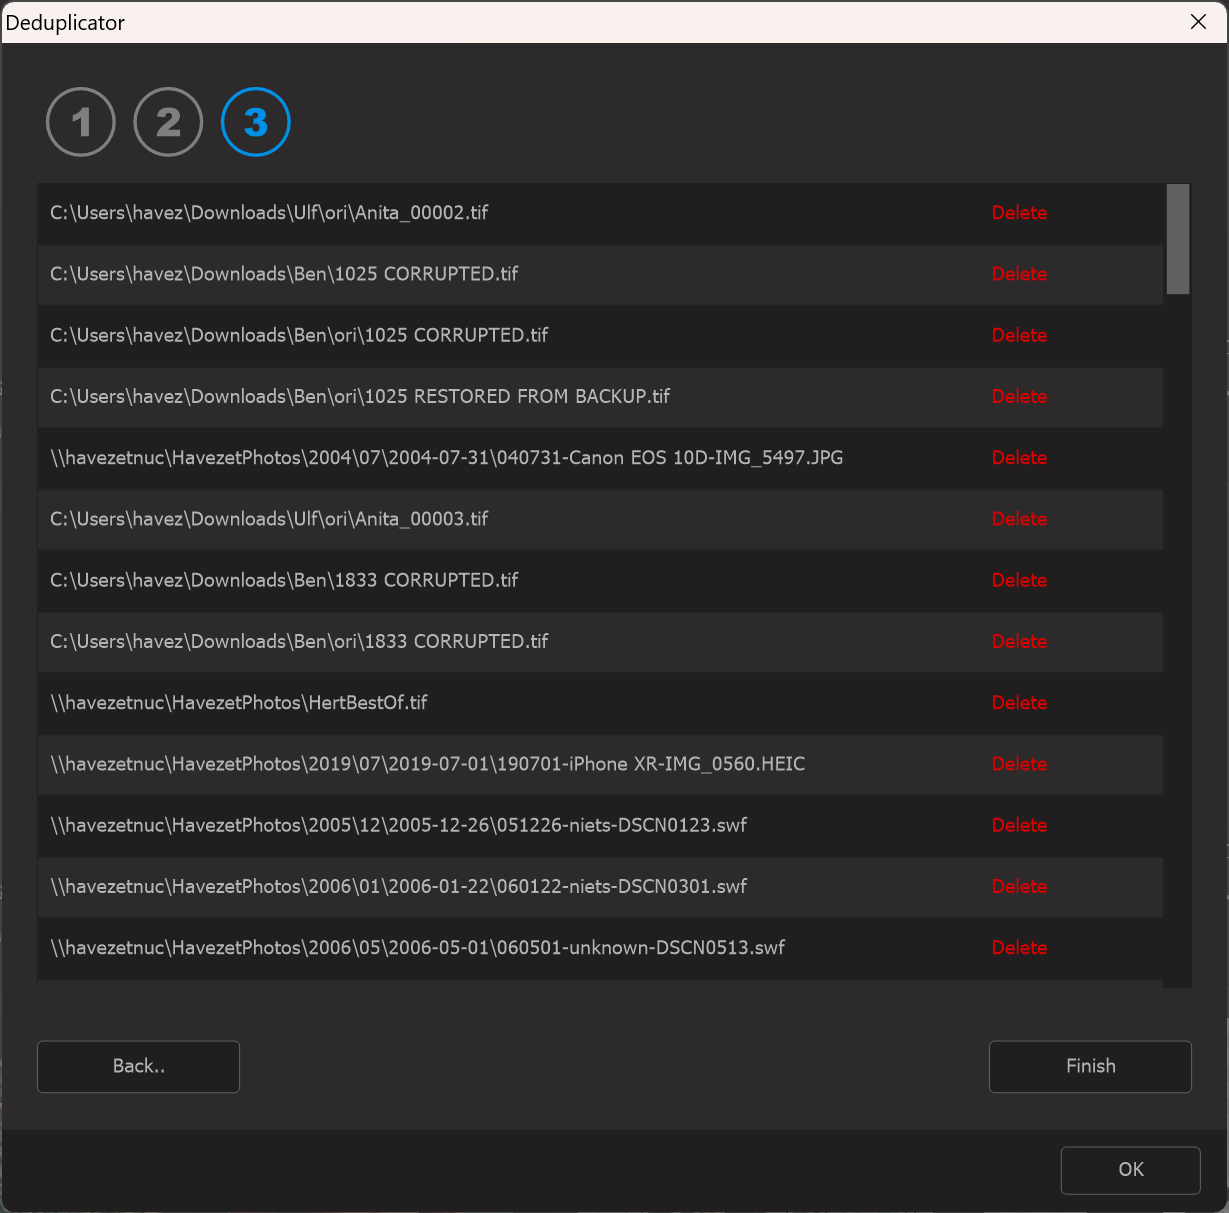
- In the final confirmation step, review the listed duplicates and their planned handling. When ready, click Finish to execute the process. At this point, the duplicates will be handled according to your settings: in this case, they will be deleted from both the disk and the catalog.
Visually Identical Files
A file is considered a “visually identical file” when its image appearance matches that of another file. This includes downsized versions of an original or multiple edited copies of the same photo.
The process for deduplicating visually identical files is similar to that for identical files. However, during the Configuration step, it’s recommended to set duplicates to be moved to an archive folder rather than deleted outright. When reviewing results, carefully inspect each set of duplicates to avoid unintentionally handling files that shouldn’t be moved.
A good setup is to select the largest file as the “keeper” and choose “Move file to archive folder” as the default duplicates operation.
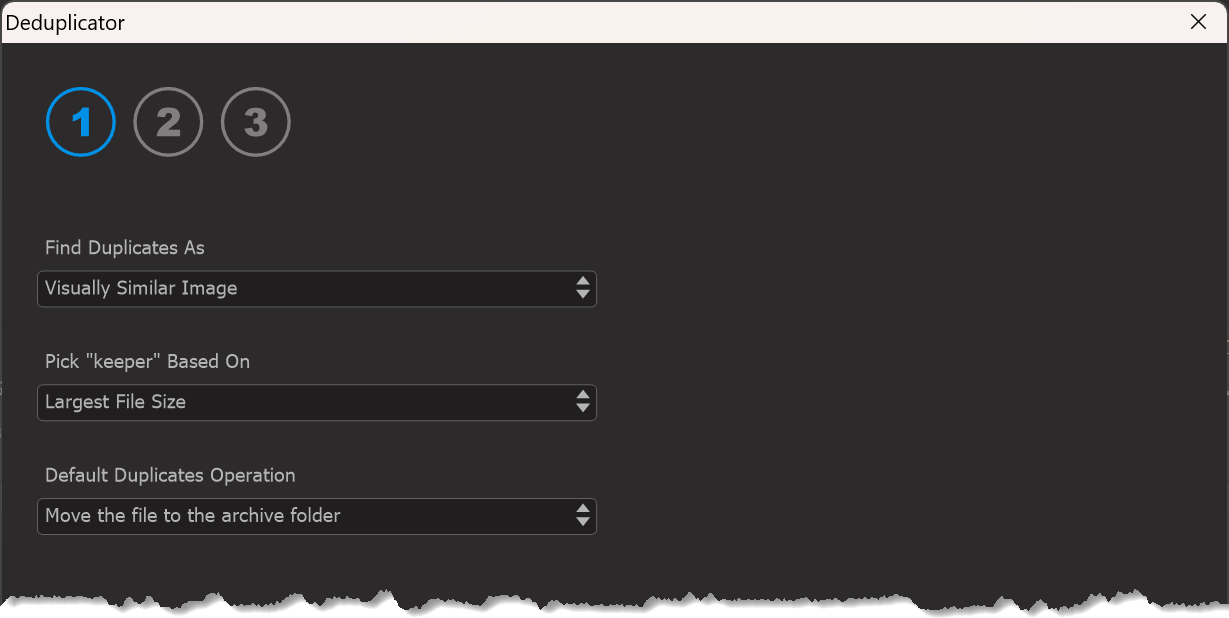
Click Next to proceed to the second step.
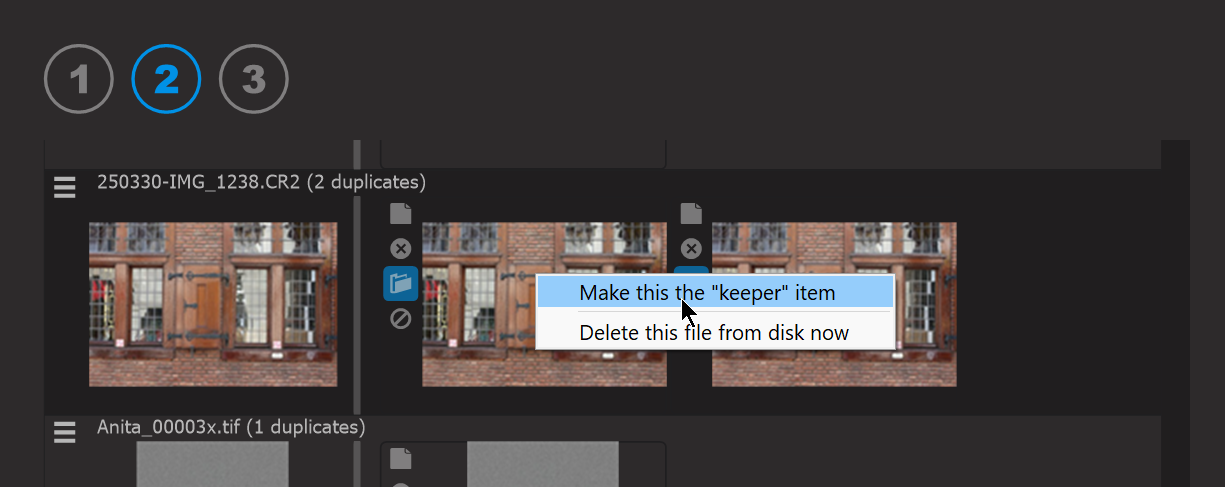
Here, thoroughly review each detected duplicate set. If the selected “keeper” isn’t correct, right-click the appropriate file and select “Make this the Keeper item” to change it.
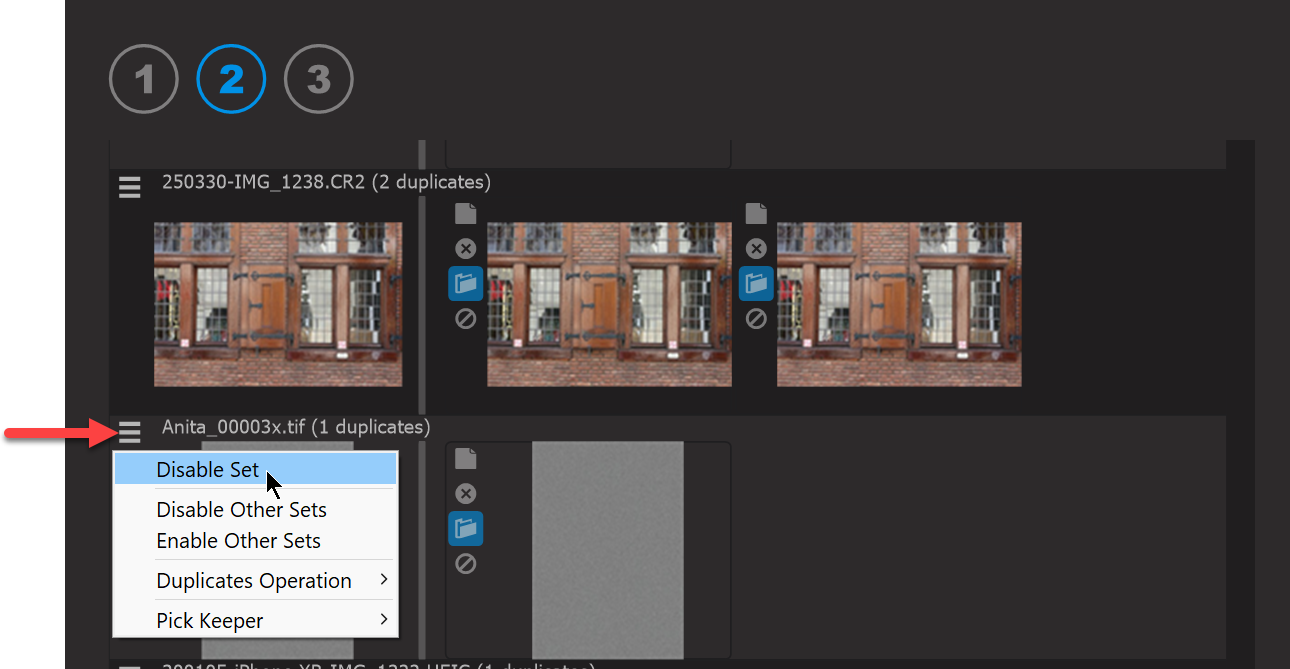
If you find a set of duplicates that should not be processed, disable that set using the mini-hamburger menu located next to it.
After reviewing, click Next again to reach the final confirmation step, where you can specify the archive folder if necessary.
Identical File Names
Sometimes, multiple files share the same name. These might be copies of the same file, but it’s also possible that your file naming convention results in different files having identical names.
The process for handling duplicates with identical file names is similar to that for identical files. However, during the Configuration step, it’s important to select “Rename the file to a unique file name” as the default duplicates operation.
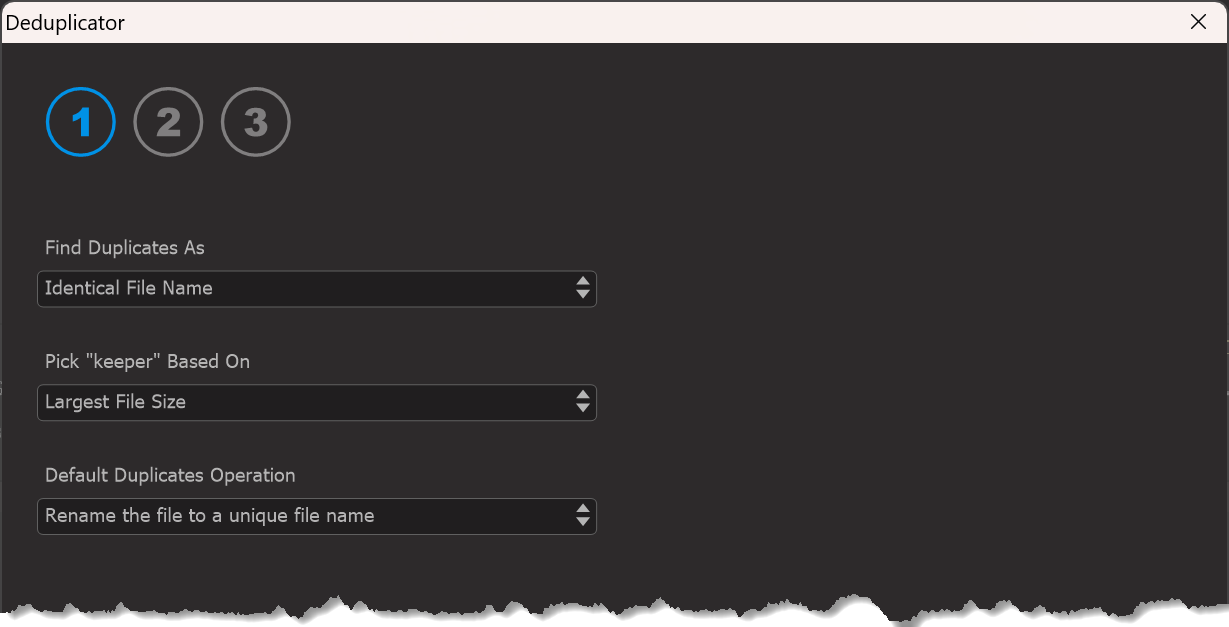
Then click Next to proceed to the review step, and click Next again to move to the final confirmation stage. Review the results carefully, and when ready, click Finish to rename the duplicate files.