
Cataloging with Photo Supreme
Travel Mode
Photo Supreme can be activated in "Travel Mode" (available only in the Single User edition). This mode allows you to access all catalog features without needing physical access to the actual files. In Travel Mode, the application operates under the assumption that your images are not with you, treating them as "unavailable". This is like using images stored on an external drive that isn't currently connected to your computer.
The benefit of Travel Mode is that you can take your catalog and previews with you while leaving the original images at home or in the office.
As noted, in Travel Mode, the application presumes that the files are inaccessible, meaning you won't be able to synchronize catalog data back to the files since this requires access to the file system.
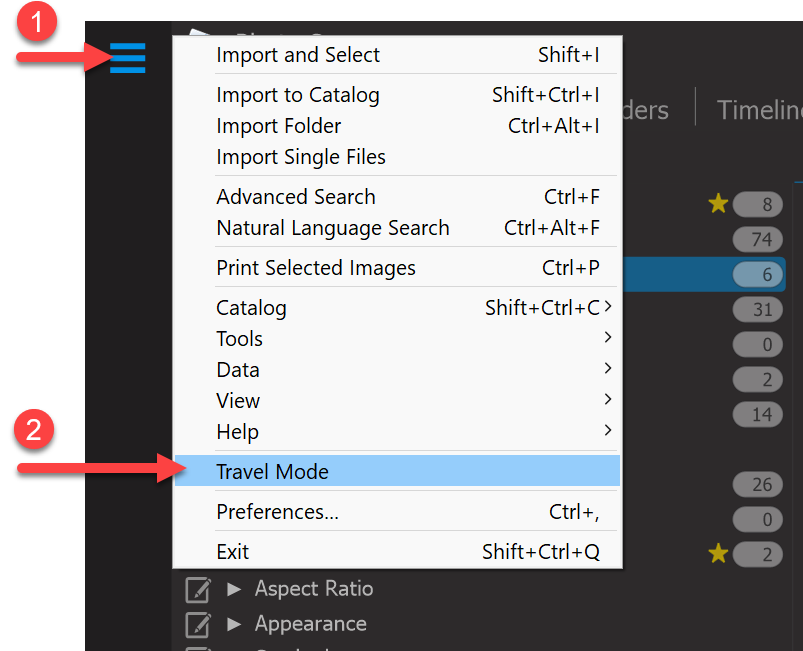
To enable Travel Mode, simply select the "Travel Mode" option from the upper left Hamburger Menu. When activated, Travel Mode is indicated by a highlighted color in the Catalog Bar.
In Travel Mode, you can still manage your catalog by assigning catalog labels, editing metadata, making image adjustments, and handling stacks. Any changes made during this mode will be saved only to the catalog. Once you exit Travel Mode, you can then synchronize your files. To disable Travel Mode, simply select the Travel Mode option again from the Hamburger Menu.