
Cataloging with Photo Supreme
Working with the Light Table
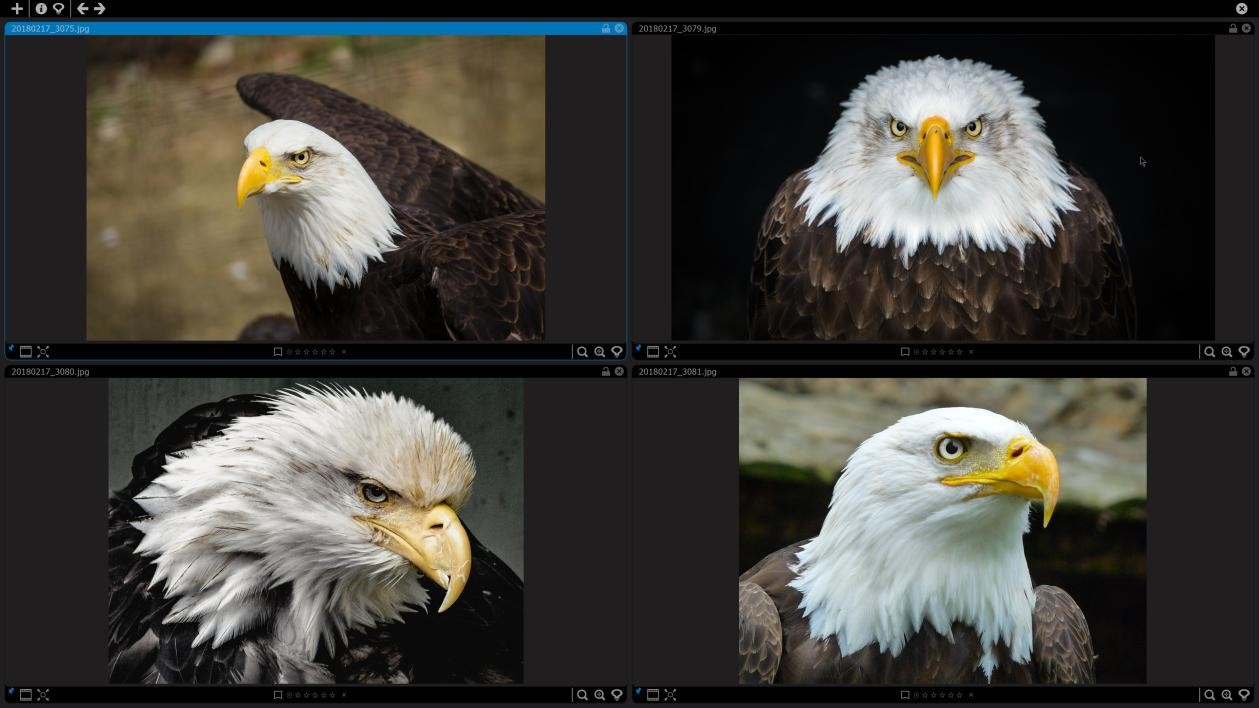
As your catalog expands, you may find it useful to make side-by-side comparisons of images. This feature allows you to view multiple images simultaneously, enabling easy comparison by zooming or scrolling together. The side-by-side comparison takes place in the Light Table, a term borrowed from a traditional photography tool with a flat, translucent surface illuminated from beneath. This setup allowed for clear viewing and comparison of photographic films and other transparent materials. In Photo Supreme, you can compare up to 12 images at once using the Light Table feature.
Opening the Light Table
To include images in the Light Table, first select the desired thumbnails. In Photo Supreme, you can choose individual images, as well as Stacks of images or Version Sets. If you select a Stacked set or a Version Set, the entire stack or set will be added to the Light Table.
After making your selections, click the button located below the thumbnails to open the Light Table.
TIP: To prevent a stack or version set from fully loading into the Light Table, hold down the Alt key on your keyboard before opening it.
When the Light Table opens, the original images will be displayed. If you're using the Light Table for quick culling and need to compare images swiftly without requiring detailed views, you can switch to Travel Mode. In Travel Mode, only the previews from the Catalog will be loaded instead of the full images.
Each image in the Light Table is contained within its own "view box", with the active box indicated by a highlighted frame. You can cycle through the active boxes using the Tab key. Additionally, while in the Light Table, you can add a new box by clicking the + icon in the upper left corner.
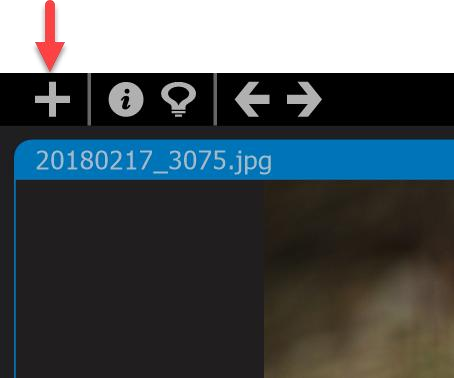
The new box will automatically load the next available image from the set of thumbnails that was used to open the Light Table. As you zoom in on one of the boxes, all other images will zoom in synchronously, and the same applies when dragging an image around in its box.
However, there may be times when you want to prevent this synchronized operation, such as when comparing two images of different resolutions. In such cases, you can hold down the Alt key while zooming in on one box to adjust the zoom factor only for that box. This allows you to zoom in on a smaller image until it visually matches the larger version. Once you’ve done that, you can release the Alt key and drag the image around to resume synchronous scrolling.
For instance, in a screenshot where each image on the Light Table has the eagle's eye centered, you would hold down the Alt key and drag the image to focus on the eye, repeating this for each box.